(Click here for a pinnable image that shows all of these steps.)
This tutorial is one of a series about slicing old clothes into fiber that you can use to make rugs, runners, and other projects, whether you weave, knit, crochet, braid, or twine.
In this post, I’ll show how to slice a long sleeve polo shirt. Short sleeve polos follow the same pattern. Separate posts to follow about t shirts, trousers, and button front shirts.
Step1: cut the bottom band off.
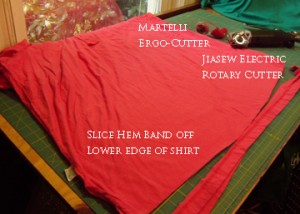
You may want to save these bands separately; they work up at a different gauge from the rest of the shirt, but when you get enough of them, you can make an entire rug from hem and sleeve bands. I save hem and sleeve bands in a basket, sew them together end-to-end, and weave hit-or-miss rugs from them. Massively thick. Different post.
Step 2: Check for the hidden buttons.

Some shirts will have a button on both seams. One shirt I sliced had a button on the seam, and NO BUTTONS AT ALL anywhere else! Buttons will destroy cutting edges.
Even a plastic button will shatter a rolling razor blade and can put a serious nick in a well-sharpened pair of shears. If the shirt has side seams (most polos do), check. If you make button art, save the buttons.
Step 3: Cut the body tube off the shirt.
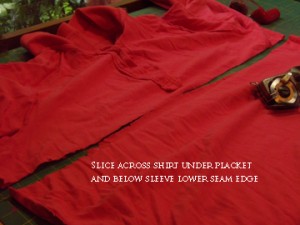
Weavers can use a seamed tube because the warp will hold the fiber in place if the seam rips out. If a seam rips out in knitted fiber, the whole piece will unravel. Knitters and crocheters should cut side seams off and process the body as a flat fold piece rather than a tube. (I show how to cut a tube into one long piece of fabric in the “recycle a t shirt” post to come next.)
Step 4: Stash the body. (!)
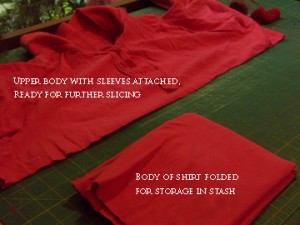
I fold this body piece and stash it without further processing until I decide to use this color in a rug. Then I will slice it into a ribbon. Flat-fold fabric is easier to store and sort than hand-sliced ribbon.
Step 5: Fold the upper body and sleeves in half.
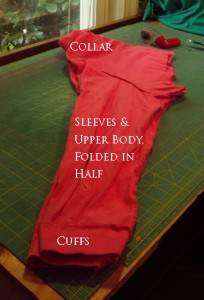
In practice, whether I fold the upper body in half depends on the weight of the fabric. If it’s a thinner fabric like this shirt was, I can do two sides at one time. If it’s a thick, high-quality shirt (and in the recycle stream due to stains or tears rather than because it is worn out), I’ll process each side separately.
Step 6: Cut off the cuffs, sleeve seams, and armhole seams.
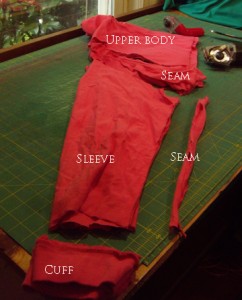
I discard the seam sections and toss the cuffs in the basket with the hem band.
Step 7: Open up the sleeves for slicing
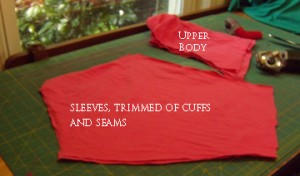
Sleeves can be sliced into a strip that’s long enough to be useful for knitting and crocheting, but is less useful for weaving. I store sleeve parts separately and use them in my knitted rugs, rather than my handwoven rugs.
In practice, I will sometimes skip this step when processing a basket of recycled clothing. I fold the sleeve pieces and add them to the “slice for knitting” basket.
Step 8: Slice the sleeve pieces.
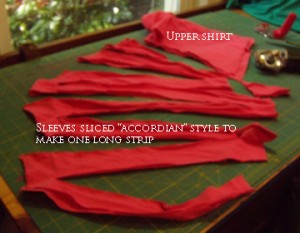
I put this image in at a large size so you can get a clear view of how to make these cuts. Cut almost but not quite all the way across from one side, and then almost but not quite all the way back from the other side, across the fabric. After six years of cutting, I can do this quickly, zip zip zip, and in place of a sleeve, I have a ribbon six or seven times longer than the sleeve was. YMMV.
(Incidentally, determining gauge will be another post. I do it instinctively and my rugs don’t mind if it varies a little.)
Step 9: Process the upper body
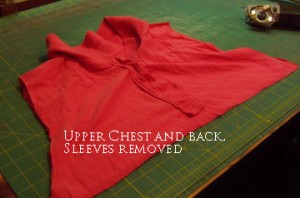
I save collars for a rug I imagine I might make exclusively from collars. The rest of the upper body can be sliced for knitting (upper back) and proddy or hooked rugs (if you allow yourself to hook with knit fabric).
Step 10: Remove collar
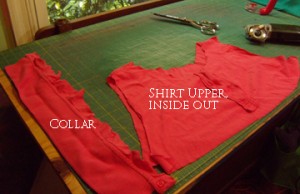
Look out for the top button!
Step 11: Unfold and remove seams
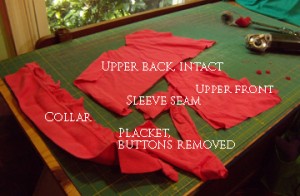
After seeing new button projects on Pinterest, I’ve started saving colored buttons in a jar. I can’t think of anything to do with the placket or seams, so I discard those.
Step 12: Slice remaining parts
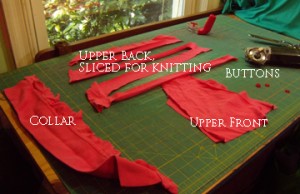
The upper back is sliced with the same zig zag, accordion cut that is used on the sleeves. I stash the upper fronts in a bag of small bits that I will test in a proddy or sewn shag rug one day.
Pinnable Image
Here are all the steps in one image.Feel free to Pin it! Let me know if you have any questions in the comments and I’ll add more information.


